How to install garden lighting
Deprecated: preg_split(): Passing null to parameter #3 ($limit) of type int is deprecated in /home/dailwtkh/public_html/wp-content/themes/jannah/framework/functions/post-functions.php on line 863
A beautiful landscape lighting design can help your yard move smoothly from a pleasant daytime setting to a cozy and inviting night-time sanctuary. Understanding how to set up path lighting is a crucial part of creating a successful lighting strategy. Lighting outside enhances curb appeal and highlights the work you’ve invested in landscaping. Lights that are well-placed and with pleasing lighting at night create the perfect atmosphere.
Before You Begin
It’s not an easy task to tackle; rather, you should spend some time planning your project and making sure you have the appropriate equipment and items to complete the job. While this procedure does require many steps, it’s an easy one for beginners. Even if you’ve never completed any electrical or lighting tasks it is possible to install outdoor lighting. Make sure you dedicate a full day to the task. Consult an expert if you encounter problems at any time.
Let Knowledge Be Your Guiding Light
Selecting the best lighting for your garden is easy taking the most important aspects into consideration. There are many kinds to think about. The solar lights are automatically turned on at night and draw their power from daylight. Line voltage lights are connected directly to the 120-volt power supply of the house and create a brilliant lighting scheme. However, lighting with line voltage requires an expert installation. Low voltage lighting draws the current of 120 volts in the home then transforms it into a 12-volt power source and then utilizes it to light up the backyard. Lighting that is low voltage efficient, safe, and energy-efficient. It is also affordable. This article explains the installation of low-voltage lighting.
Special Features
Outdoor fixtures have various unique features that increase value, reduce costs and make lighting easier. Energy-efficient lighting conforms to strict standards. It lowers the cost of electricity and makes it easier to use only lighting when it is needed. The dusk light from dusk to Dawn light has an electronic photocell that turns on the fixture at dusk and shuts it down at dawn. Dark Sky-approved fixtures minimize light pollution by releasing less blue light and relying more on warm light shades. These fixtures help keep the stars visible and decrease the use of energy.
Pro Tip: Pick water-proofed fixtures. They’ll last longer even in the event of snow and rain.
Choose Your Ground
The first step to implementing an impressive DIY lighting plan is to sketch out the ideal arrangement. While deciding where to place lighting fixtures, think about the routine for maintaining your lawn. Make sure you avoid lighting locations that make it difficult for you to mow the lawn or take care of the weeds. Be respectful of the neighbors’ space by keeping light off their lawns. Post height is also crucial. A post that is taller will reflect more of the area, and light will be less intense.
The lawn needs to be prepared. This is the next step on your list. Install the lights in the lawn, where you would like to put the lights. Then, roll out your cable to ensure you have enough power for your whole yard. Make plans for obstacles such as trees or bushes, as well as rocks as well as irrigation lines. Numerous cities and counties require that homeowners obtain digging permission prior to starting a project and should contact the municipality’s Utility notification centre or the digging hotline.
Can You Dig It?
Prepare the dig site by trimming the lawn, removing leaves, and ensuring you have an easy-to-follow work space. You must have a square-bladed shovel for this task.
- Once your lawn is clear then you can flip the soil where the lights will be. Make use of the shovel’s blade to move it under the grass, and then remove it away from your soil.
- Detach sod into one piece. It should be approximately 12 inches in width. It is best to fold the sod you have removed into itself, leaving the other half of the soil unaffected.
- Check the fixture’s lighting on the dirt. It is not necessary to place it in the ground just yet, however, make sure the fixture doesn’t hang over the road, driveway or the sidewalk.
- Utilising the shovel with a square blade, create a shallow, narrow trench that follows the path you created to connect your wire.
Pro Tip: Trench is the perfect location that can be used for wiring underground. The trench should only be about 2 to 3 inches deep. A longer trench will hinder the connection of wiring lights. Place the shovel’s blade into the ground, then move it around in order to form an elongated V-shaped trench.
Installing the Wiring
The most complex portion of learning to install the post light takes your time. Consult a professional if you are ever in doubt. Make sure you have the following tools available:
- A narrow piece of 1/2-inch wood or a round tool handle
- Long steel punch
- 12-gauge, 14-gauge and 16-gauge low-voltage wire; the best wire for a particular fixture
- Transformer
- Torpedo level
- Voltage Metre
Pro Tip: The power of the transformer has to be sufficient to supply all the lights included in your lighting scheme. For instance, if, for example, you have three 100-watt lights, you’ll require a 300-watt transformer.
- Before you begin, turn off the power at the breaker box before you begin. This is a crucial precaution to ensure your safety.
- Locate the GFCI-protected outdoor electrical outlet. This is the location where the transformer is.
- Remove the low voltage wire and remove the insulation at the top. Take off between 1/2-inch and 3/8-inches of the insulation. Attach each strand of insulation to the transformer’s terminals. Connect the transformer to an outlet but leave it off.
- Unwind the wire when you place it on the trench. It doesn’t have to be straight.
Pro Tip: Be careful not to pull the wire too tight. A small amount of slack can be ideal to ensure safety and also for future adjustments to lighting fixtures.
- Make a small cut in the sod, where the fixtures will be placed.
- Utilise a long steel hammer or a larger screwdriver to drill a hole in each stake of the fixture. It should be deep enough such that the top part of PVC footing is at a level in relation to ground.
- Make sure you pull a couple of inches of wiring between each of the cuts. This could mean pushing the sod towards it, however don’t completely cover the dirt just yet. Pick up the two connector halves at the lower part of the fixture, and slide them onto the cable that is exposed. Push them in to make them click.
- Place the light fixture in the hole you’ve prepared. Make sure you don’t force the stake through, as it is crucial to ensure that the lights function before securing them.
- Set up each fixture and connect the wires as you go. The power should be turned on from the switch box, and after that to the box for transformers. Utilise a voltage metre to ensure that the voltage of each fixture is operating between 10.5 to 12 Volts.
- If the lights are operating well, you can turn them off at night. This will give you the opportunity to make any changes to achieve a different look.
- Once the fixtures are in place and precisely where you want them to be, utilize the stick of plywood or an instrument handle to force the wire into the trench. Make use of a shovel for spreading the dirt evenly across the cable.
- Re-do the sod by spreading it across the ground.
Finishing Touches:
The bulk of the installation work has been completed. There are only just a few steps to make sure your lighting system is up and operating. You’ll require a torpedo level in order to complete this task. The grass seed is not required.
- Fix the light fixtures in place by pushing them completely down. The bottom edge must be in line to the floor. It should also conceal the cable.
- Use a torpedo level horizontally against the light fixture. If it’s uneven, make any necessary adjustments prior to filling it with dirt, and then packing it to the fixture.
- If lighting installations left areas of bare soil in the trench you can add grass seed to make sure that the fixtures blend seamlessly into your landscape.
Bright Ideas for Outdoor Lighting:
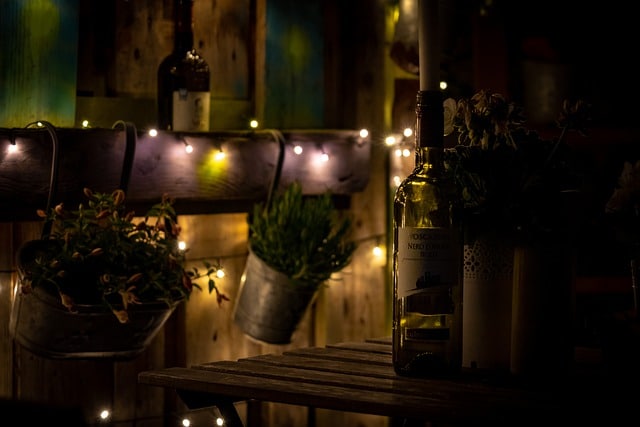
When you think of an inspiring outdoor lighting design think about layering the light with a mixture of ambient, task and accent lighting. Layered lighting creates ambiance as well as functionality, and gives an overall look.
Use path lights in conjunction with accent lighting fixtures to create layers of lighting. The hidden accent lights like ground-level well lights light up and draw attention to your garden, antique fence, or an ivy-covered wall. Wall sconces can add a new design element to the lighting scheme, bringing security and a warm illumination in the entryways. String or rope lights create the ambiance from above, making it possible to take your outdoor pursuits throughout the night. Make use of steps lighting and recessed lighting to light your paths and direct visitors to the entrance. Switch between recessed and path light lighting fixtures to create a striking and creative design. Be sure that the different fixtures and bulbs you choose match each other.
If you’re aware of how to set up the path light You can select from various bulbs and fixtures to make an appearance that matches your personal preferences. The process is simple and the result is stunning. Make sure you have all the supplies and tools in your possession prior to starting and seek professional help if you require it. Utilize lights to create an outdoor space exactly as inviting as you would find inside your house.
Deprecated: preg_split(): Passing null to parameter #3 ($limit) of type int is deprecated in /home/dailwtkh/public_html/wp-content/themes/jannah/framework/functions/post-functions.php on line 863