
How to Set Up Solar Panels on Your Home?
Deprecated: preg_split(): Passing null to parameter #3 ($limit) of type int is deprecated in /home/dailwtkh/public_html/wp-content/themes/jannah/framework/functions/post-functions.php on line 863
Know how to install solar panels at your home to save from not having to use the utility company. This is a complete guide from component assembly to system connection that will make you independent in energy and save for the long years ahead.
Solar panels are now a viable option for both commercial and residential properties. Since 2011, two-thirds of the world’s solar capacity has been installed. Installing a solar power system is becoming increasingly affordable. However, you can save money by doing it yourself. By following the guidelines in this guide, a lot of money can be saved by building your own solar photovoltaic (PV) system.
How to set up and install a solar panel on your home is explained here.
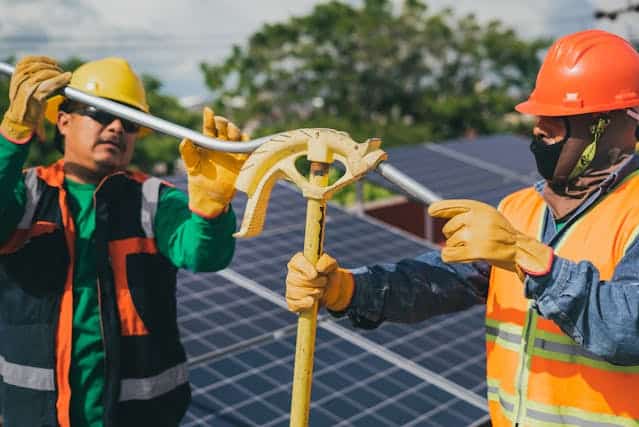
1. Assemble the Solar Panel Parts
The construction of a photovoltaic panel for your home system starts with gathering some basic elements.
The 4 major components would be:
- Solar panels,
- A battery charger,
- An inverter,
- A battery system.
A meter, fuses, MC4 connector, and breaker are all required. Never forget to read the solar panel module’s instructions.
2. Figure Out How Much Power You Use
After determining how much power you use in your home, you can begin installing solar panels. This isn’t a difficult task. It’s as simple as writing down the daily appliances, such as a television, light fixtures, and a fan.
Next, consider the amount of time these appliances are used every day. Check your household electric appliances’ run time and power rating by going through their specifications.
Multiply the appliance’s operating time by its power rating to arrive at the ‘Watt-Hour.’ Add up the individual watt-hour figures for each electrical device and multiply them by the number of devices to arrive at the total. An online off-grid load calculator can also be used to speed up this process.
3. Select The Battery And charge It Up.
Solar power has the major drawback of not supplying power when the sun goes down. A battery can be used to quickly solve this problem. Lead-acid or lithium-ion batteries store and discharge solar energy generated during the day.
A consistent supply of electricity can be assured with a suitable battery storage capacity. Charge monitoring is only possible with an electronic device called a power controller. These separate the battery from the solar panels.
LED lights are commonly used to indicate the battery’s charging status, and the control system adjusts the power flowing into that battery.
4. Setup The Inverter
Electricity generated by solar arrays (DC) can only be used by electrical appliances (AC). Using an inverter instead of an adapter can be a lifesaver when traveling. Inverters come in many types, wattages, and waveforms.
Some appliances, like a refrigerator, cannot use modified sine waves, but square waves can. Pure sine wave inverters are best for solar systems.
5. Set Up Solar Panels on The Top
When the solar panels, battery, control system, and inverter are ready. Choose a roof or open area with free sun. Make or buy a mounting stand. The mount’s tilt should be close to your latitude angle. Solar panel repair and control depend on proper placement. Therefore, panels must face the sun all day.
Finally, wire the solar panels. Solar panels back have a junction box. The junction box is polarized. In large panels, the junction box has MC4 terminal wires. Small solar panels require you to align the junction box’s external wires. Black and red wires connect negative and positive terminals.
6. Link The Solar Panels to the Battery.
The battery must be linked to the solar panels. You don’t have to do extra work if you have a PV system that includes these features.
Series and parallel connections must be made in cases where a single unit is not provided. A series connection can be made by connecting one device’s positive terminal to another’s negative terminal. Parallel connections require connecting two devices’ negative terminals.
7. Inverter And Battery Installation Stands
You can’t have a home solar system without batteries and inverter stands. Building the stands, yourself or purchasing them is an option. The wiring can start as soon as the inverter and battery have designated locations.
The first step is to connect the wires. The first connection on the left is where the solar panels are connected to the controller. A second cable connects the controller to the battery. Connect the controller to the direct DC load using the link shown below.
To connect the solar panel to the charge controller, you’ll need an MC4 connector. The LEDs should light up when the battery is plugged into the controller. The same goes for connecting the battery’s terminals to the inverters.
What Is the Average Price of Solar Power for a Household?
Let’s start with estimating what installing a solar power system in your house will cost. 5KW Home solar power systems, estimatedcost between $12000 and $16,000.
Why is there such a wide range in prices? To a large extent, however, your options will be limited by your budget and the type of panels you choose to install. As with any renewable energy source, remember that solar power is a capital-intensive endeavor. Most of your costs will be incurred when you purchase your system’s components. The cost of the solar panels is almost certainly going to be the most expensive part of the project.
Additional costs are also involved.
Installers will need an inverter, meter reading equipment, housing components, cables, and wiring kits.
Battery storage is another option for some homeowners. Because of their high cost and lack of utility, batteries haven’t been widely used in power systems. The cost of installation must also be taken into consideration.
Additional operating and maintenance costs are incurred by PV solar arrays, on top of the basic installation costs. Regular cleaning of solar panels is also necessary, as is replacing inverters and batteries (if installed).
Wrap Up:
Installing solar panelsin your home is quite practical and efficient, not only for reducing energy costs but also for gaining energy independence. Now, using these steps, you can assemble and install a solar power system all by yourself.
From calculating your power consumption to setting up the inverter and finally connecting the battery, every step is important in the installation process. What’s more, waving goodbyes to the utility company’s monthly energy bills and tax benefits from this investment may be enough reason for one to consider investing in solar power.
Though the upfront cost might be huge, using solar energy in the long term will save money and positively impact the environment, making it a worthwhile choice for homeowners.
Deprecated: preg_split(): Passing null to parameter #3 ($limit) of type int is deprecated in /home/dailwtkh/public_html/wp-content/themes/jannah/framework/functions/post-functions.php on line 863